
Cut-off Knife for Cold Heading: Inspect the Blank After Replacement
After replacing a cold heading cut-off knife, accept the cut blank before judging the downstream forming tools. Record blank length, the condition of both cut ends and how the blank reaches the first die. A knife that fits its holder has passed an interface check; it has not yet demonstrated an acceptable cutting result.
This guide provides a sample-record method for buyers comparing an existing knife with a replacement. It does not prescribe clearance, blade hardness or machine adjustment. Use the machine manufacturer's procedure and the agreed part inspection plan for operation and acceptance limits.
Identify the knife and its mating cut-off die
In conventional cold heading, the moving knife shears wire supported by a cut-off die, also called a quill. Some arrangements also hold and transfer the blank. Carpenter Technology illustrates this sequence in Heading Hints. The installed machine design determines the actual components and their functions.
Before ordering, mark the moving component and the stationary support on an assembly drawing. Keep their drawing revisions together. A loose blade photo cannot establish the relationship between the cutting edge, support face and mounting reference. For a component quotation, see Jungu's cutting knife tooling for cold heading machines.
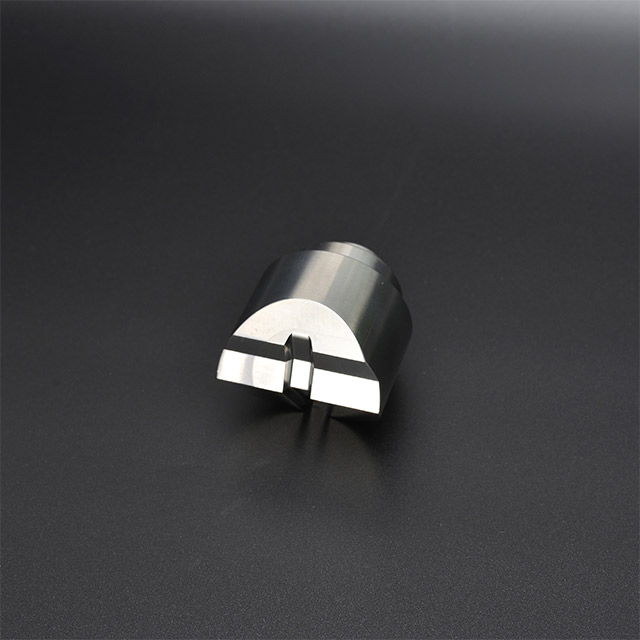
Keep a comparison that can be traced
Where usable reference samples exist, retain blanks from the previous approved setup alongside replacement-tool trial samples. Identify each sample separately. Record the wire batch, actual wire diameter, material condition, machine, knife and quill revisions, and trial stage. Note whether a sample came immediately after setup or from a later check; do not mix these groups in one unlabelled bag.
Compare under documented conditions. If wire, lubricant, feed settings or the mating cut-off die also changed, list those changes explicitly. The result can still be evaluated, but it cannot isolate the knife as the only cause. If no sound reference exists, compare against the agreed drawing and inspection criteria rather than a worn knife's output.
Use a blank acceptance sheet
| Record | What to retain | What the observation cannot prove |
|---|---|---|
| Length | Individual readings, measurement reference and sample IDs; do not retain only the average. | A correct average does not show that individual blanks meet the agreed limits. |
| Cut ends | Images of both ends, with a scale and consistent orientation relative to the cutting direction. | A flat-looking photograph does not establish end-face geometry or a measured tolerance. |
| Burr and edge condition | Location, direction and measured size if specified; retain representative affected blanks. | A burr alone does not identify knife material as the root cause. |
| Transfer evidence | Identify samples collected after cutting and after the next agreed accessible stage. | A mark seen only later does not prove it was produced during cutting. |
| Tool identity | Knife, mating support and holder drawing revisions, with installation references. | A matching overall tool size does not verify the complete installed interface. |
Agree the measuring method, limits, sample quantity and approval responsibility before the trial. There is no universal sample count or burr-height limit in this checklist. Measurements and photographs should refer to the same numbered blanks so that a supplier can relate an observation to the actual specimen.
Separate observations before proposing a correction
Length varies, while the cut faces look similar: send individual readings and the recorded feed/stop conditions for review. Do not request a harder knife solely because the blank lengths differ. The comparison needs to distinguish the cut result from how much wire was presented to the cutting position.
Length is acceptable, but an end is angled or burred: document both cut faces and the installed knife-to-quill relationship. Ask for an interface review before changing edge material. Taiwan Metiz Alliance's cut-off tooling description identifies the knife and cut-off die as cooperating components and requests machine seat dimensions, model and wire diameter.
A surface mark appears after transfer: keep the earlier-stage sample if it can be collected under the machine's approved procedure. Compare the same surface orientation at the two stages. This is an evidence request, not proof that the transfer fingers caused the mark. Review the complete cut-off mechanism tooling interface when the replacement scope extends beyond the knife.
Release the blank to the forming sequence
Record cutting acceptance separately from acceptance of the finished fastener. The first establishes that the agreed blank requirements were met; the second checks the subsequent forming result. A satisfactory blank does not validate the rest of the tool set. Conversely, a later unfilled corner is not enough evidence to reject the knife without examining the earlier samples.
For the next stage, use the cold heading forming-sequence review to connect blank requirements to the station drawings. Record any approved deviation and its scope; an informal photograph of a finished part should not replace the agreed blank inspection record.
Questions before replacement approval
Can a knife be approved from a finished screw sample?
A finished sample can show a later result, but it does not preserve every detail of the original cut ends. Keep the cut-blank inspection record as well as the finished-part check.
Must the knife and quill always be replaced together?
That depends on the installed condition and drawing requirements. Identify which component will be retained and have its mating interface reviewed; this guide does not impose automatic paired replacement.
What should accompany an enquiry?
Send the machine model, assembly and component revisions, wire specification, blank requirements, numbered observations and the planned replacement scope. Ask Jungu to review the drawings and cut-blank evidence before the replacement quotation is finalized.